Tag Archives: summer

Summerfest Nails!

30 Jun

Yesterday night a friend and I decided to go down to Milwaukee, Wisconsin for Summerfest! For anyone who doesn’t know, Summerfest is the worlds largest music festival, spanning over 11 days and hosting over 700 bands each year! It’s awesome being a Wisconsinite and having such a huge music festival right in my backyard. For more information about Summerfest you can go to http://www.summerfest.com/home/ . This was my second Summerfest, and I decided to do my nails for the occasion. I recently bought a set of nail art brushes and this seemed like the perfect time to test them out!

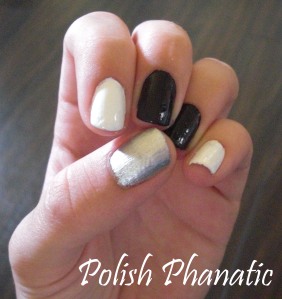
I started with a base coat. The thumb is two coats of silver, the ring finger is just one coat of black, and the rest are two coats of white (I later re-did the middle finger in white as well, but that was done after I took this picture).

Each finger was done with a different design to represent Summerfest. I’ll go over each finger individually. First, is the thumb. On my thumb is the Summerfest logo (just a red smiley face). This was really easy to do with a nail art brush. It took a few coats of red to get the red dark enough but it came out pretty well in the end.

On the next three fingers I tried to represent this statue just inside one of the gates (Also, you can see the Summerfest logo that I did on my thumb on the base drum of the statue).

On my index finger I decided to represent the piano. Piano keys are really simple to do. Just start by drawing two skinny lines vertically up the nail, then add to blocks to the tips of them, and done! Simple, easy, and quick!

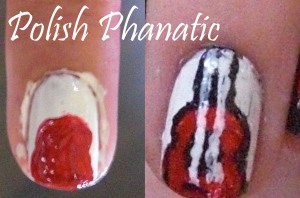
On the middle finger I represented the guitar. Originally I had this nail painted black but the red wasn’t showing through very well against the black so I repainted it white. I started by painting a peanut shape in red at the tip of the nail. Then, I just added a line of black to the other end of the nail, traced around the outside edge of the body of the guitar, and drew a black circle in the middle of the red. Then I finished it of by adding two white lines for guitar strings. The only thing I  wish I would’ve done is flip the guitar around so the neck of the guitar reached up toward the tip of the nail instead of toward my finger, because now technically it’s upside down. But, I still like it.

On the ring finger I tried to represent the drums, however it ended up looking more like a tambourine. But, it still looks okay. I started with a white circle, then traced around the outside edge of that in red. I finished it off with some silver dots and an ‘SF’ in the center of the drum.

For the pinky I just wanted to do something very generic and musical, so I just painted a bunch of music notes. To do the music notes I put a slanted line, then a vertical line and finished it off with a diagonal line downwards (it’s a lot easier to see in the picture than to describe it). When I put the top coat on some of the notes weren’t completely dry and therefore they smeared a little (which you can see in the last photo).

I finished all of these with a top coat to make them extra shiny. The nice thing about all of these is that, with the exception of the thumb, the rest of these could be used for just a music themed manicure rather than being specific to Summerfest. An all piano, or guitar, or music note manicure would be great also.

So, I have a little story to go along with this. My friend and I were waiting for the band we were going to see, MUTEMATH, to start playing. They were playing at the U.S. Cellular Connection Stage, and the cool thing about that stage is they had a giant screen where the crowd could text messages or pictures to a certain number and they would appear on the screen. So, we decided to take a picture of my nails and text it to the screen to see what would happen. Within five minutes a picture of my Summerfest nails showed up on the screen! Definetely a cool moment to see them up on a huge screen. I took a picture of the screen, but we were up in the front so it was hard to see the picture. The actual picture we texted is on the right.

Just to show how close we were to the stage, here’s a picture I took last night. You can see the corner of the screen in the upper lefthand corner of the picture.  MUTEMATH was great. If you haven’t heard of them here’s a live version of one of my favorite songs by them. You should definetely check it out. http://www.youtube.com/watch?v=M5x75NeC8Hg&feature=channel&list=UL

These are the nail art brushes I used to do this manicure. The top one is what I used for the larger red designs such as the red of the guitar and the logo on the thumb. The second one is what I used for the piano and for the neck fo the guitar. The third is technically a dotting tool, but I used it for the smaller designs such as the music notes, the SF on the drum, and the strings on the guitar. The last one I used for the white circle on the ring finger.

And, finally, these are the polishes I used. The names and brands are listed below the photo.  This was a long post but I hope you enjoy my Summerfest nails and think about doing something similar at some time! Leave me any comments below and have a great day!

Base Coat:
LA Colors Nail Hardener Base Coat

White:
Sally Hansen Hard As Nails- Hard to Get

Black:
Sally Hansen Insta- Dri- Night Fight

Silver Accents:
Kiss Nail Art Paint- Silver Glitter

Silver Base:
Sally Hansen Color Quick Pen- Silver Chrome

Red:
Kiss Nail Art Paint- Red

Top Coat:
Sally Hansen Insta- Dri Anti- Chip Top Coat

Sunrise Stripes!

25 Jun

I loooovveee how this manicure turned out! It started as a failed attempt at water marbling, (My first try, and it just wasn’t working out. I’ve figured it out since then, and I’ll be posting pictures of that in a few days.) but after getting sick of dealing with the water marbling I decided to try some thing different. All of this is free- hand, no tape this time! I started with a clear base coat, followed by two coats of a light orange.

After that was dry I tilted the brush of my next color, a light coral, and drew a thick line about a third of the way up the nail. Then, I filled in the rest of the nail toward the tip with that light coral color.

To finish them off I added another layer just like the last time. This time the color was a red orange color. To finish off the manicure I covered it in a top coat to make it extra shiny and prevent chipping! I decided to take pictures of this one outside, to really show off the colors in the natural sunlight.

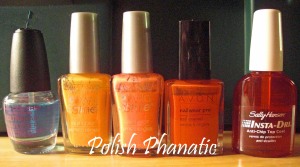
These are the polishes I used. The names and brands are listed below.

Base coat:
LA Colors Nail Hardener

Light Orange:
Wet n Wild- Sunny Side Up

Light Coral:
Wet n Wild- Blazed

Red Orange:
Avon- Tangtastic

Top Coat:
Sally Hansen Insta-Dri Anti-Chip Top Coat

Neon Diagonal Stripes!

22 Jun

I love neon nails in the summer! These have really simple nail art on them so they stand out from plain neon nails!

I started with a clear base coat, then added three coats of this neon green by Sinful Colors. Once the green was dry I started adding stripes with these nail art paints that have a skinny brush in order to make it easier to create skinny stripes. I started with the purple, then added the light green, then finally the orange.

Once the stripes were dry I added a top coat to add the shiny top and finished off the manicure!

These are the polishes I used. The names and brands are listed below the picture.

Base Coat:
LA Colors Nail Hardener

Green Base:
Sinful Colors- Irish Green

Neon Stripes:
Kiss Nail Art Paint- Beach Purple
Kiss Nail Art Paint- Beach Green
Kiss Nail Art Paint- Neon Orange

Top Coat:
Sally Hansen Insta-Dri Anti-Chip Top Coat

Green Gradient Stripes

16 Jun

I was heading back up to school to work for a week (hence the lack of posts these past few weeks) and wanted something simple but nice looking to do with my nails. My school’s colors are green and white, and so I came up with this gradient striped manicure! It looks a lot harder to do than it actually is.

I started with a base LA Colors Ultra Nail Hardener. My nails have been really stained lately from painting my nails with reds or dark colors, and having a coat of this base under everything helps to prevent that. I then painted three coats of white over that base coat.

Once that was very dry I taped off the majority of the nail so that there was just a small area at one end of the nail uncovered. Then I painted that with a dark green and let it dry.

Once that dark green was really dry I removed the tape leaving behind a straight line. Then I taped off  all but a small stripe in the middle of the nail. I painted that in a grass green.

Once that stripe was dry I taped off all but the top and painted that in a lime green color. Once I removed the tape on that stripe and coated the whole thing in an anti-chip top coat I was done! The stripes look really complicated but in reality it’s very simple.

These are the polishes I used. The names and brands are listed below the picture.

Base Coat:

LA Colors Ultra Nail Hardener


White Base:

NYC- French White Tip


Green Stripes (From Darkest to Lightest):

Revlon- Jaded Night

NYC Quick Dry- High Line Green

Pure Ice- Wild Thing


Top Coat:

Sally Hansen Insta- Dri Anti- Chip Top Coat

Subtle Summer Suns

31 May

Nail art is great, but sometimes it’s nice to have something less ‘in your face’. This look combines some small nail art suns on the thumbs, but the rest of the nails are just painted gold. The suns are a bright yellow over the gold, so they aren’t extremely visible. It’s a very subtle look, but I love the golden color and the suns on the nails add a little something extra.

I started with three coats of gold/dark yellow. It probably would’ve been fine after two coats but my nails are a little stained from my past polishes, so I needed an extra coat to cover up the dark blue stains. These are my nails after the first three coats.

I then added the suns with a nail art polish with a skinny brush. This brand is the same brand I used to paint the plaid stripes in my Perk Up Week-Old Pink Toe Nails post, so if you would like to see a picture of the brush check out that post. I finished it off with a top coat and that was it!

It’s very simple and very subtle but nice for when you don’t want something too flashy. These are the polishes I used. The names and brands are listed under the photo.

Golden Base Coat:

Sinful Colors- Let’s Meet

Suns:

Kiss Nail Art Paint- Neon Yellow

Top Coat:

Sally Hansen Insta- Dri Anti-Chip Top Coat

Perk Up Week-Old Pink Toe Nails!

30 May

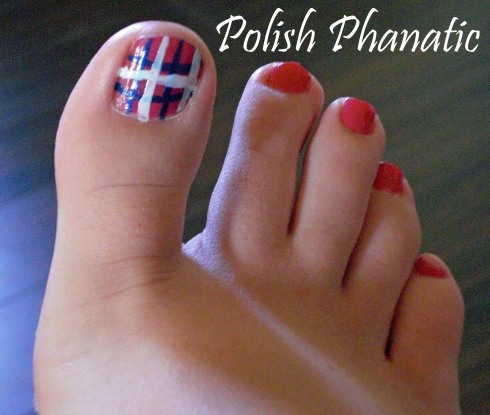
I love the way that toe nails look while painted, but honestly, I hate painting them. I’ve never been a very flexible person, and finding a way to paint my toe nails has always been a bit of a challenge. Usually, I paint them once every three weeks or so. A few weeks ago I painted my toes a pink color, but yesterday I was getting bored with them. Rather than re-painting them (they weren’t chipped or grown out yet), I decided to perk up the pink by adding plaid nail art onto the big toe.

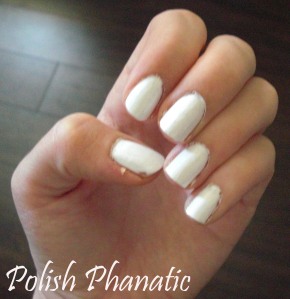
This is what my nails looked like before I added the plaid. The polish was Wet n Wild Wild Shine- Lavender Creme. I’d painted them about two weeks earlier.

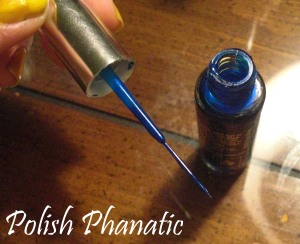
I started by adding the blue stripes. I used a polish that is made for nail art and therefore has a long skinny brush made for drawing lines. The trick with these brushes is to make sure you don’t have too much polish on the brush. If there’s too much it will be much harder to make the lines straight and even. So, make sure that you wipe the brush on the mouth of the bottle before you draw the lines.

After I drew the blue lines I added white lines in between the blue ones to finish the plaid.

I added a top coat over the top of it to re-seal it and that was it! It only took a few minutes and completely changed the whole look.

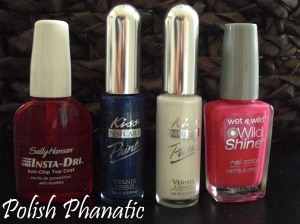
These are the polishes I used. The white and blue are made for nail art and have skinny brushes as pictured above. The names and brands of the polishes are listed below.

Pink Base Color:

Wet n Wild Wild Shine- Lavender Creme

Plaid Colors:

Kiss Nail Art Paint- Pearl Blue

Kiss Nail Art Paint- White

Top Coat:

Sally Hansen Insta Dri Anti-Chip Top Coat

Beach Chevrons to Start off the Summer!

26 May

I love the way geometric shapes look on nail art, especially chevrons. I decided to use a light shade of blue and a dark mint along with white to make the chevrons look light – the perfect way to start off the summer!

I started off with three coats of white nail polish. It probably would’ve been fine after two coats but I wanted to make sure that the white stayed bright after peeling the tape on and off.
After the white was completely dry I taped off a triangle on the bottom and painted on the mint color.

A couple hours after I took the tape off I re-painted some of the white because it had faded while taking the tape on and off and chipped a little bit. I waited until the following day to make sure the white was completely dry again and then added two strips of tape on each nail to block off a little strip of white around the mint. Then I painted on the blue. After the blue was fully dry I peeled off the tape, cleaned off the edges, and finished it off with a top coat.

f

These are the polishes I used. The names and brands are listed below the picture.

From Left to Right:

Sally Hansen Insta- Dri- Brisk Blue

Wet n Wild Megalast- I Need a Refresh

NYC- French White Tip

Sally Hansen Insta Dri Anti Chip Top Coat